Uncategorized
(CLOSED) Get Your Nails Holiday Ready with Jamberry!
If you're anything like me you saw the word Jamberry and said "huh?". No worries, I'm just getting acquainted with this Fab and fun product myself. I had come across Jamberry during one of my many cyber strolls through the interwebs and while it sparked my interest, I didn't really look into it any further. Enter Nikki, a Jamberry Consultant I had the pleasure of 'meeting' through an online Mom business group. I told Nikki that I'd love to try them out and she was nice enough to send me a sample to review.
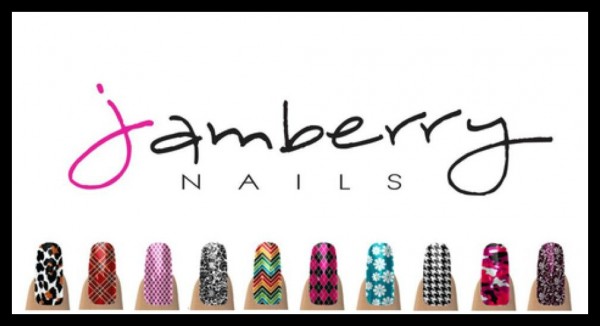
What are Jamberry Nail Shields?
"With over 250 designs, there is something for EVERYONE!!Our nail shields are easy to apply and give you a salon look at home for a fraction of the cost. They last up to 2 weeks on fingers and up to 6 weeks on toes. They are NOT nail polish, so they won’t chip, smudge or stain your nails. They are free of harsh chemicals and fumes. Your nails will look great with Jamberry Nails!” – Source
Nikki sent me everything I needed to get my Jam(berry) on: sample shields, application instructions, alcohol swab, orange stick, emory board and her contact info for any nail emergencies lol
I was drawn to the black and white designs and went with the Black Floral shield paired with Essie ‘Scarlett O’hara’
Now I have to admit I was a little intimidated by the application process. Nikki emailed me a couple of videos so that I could see how it was done since she wouldn’t be here to help me with them. After watching the video I couldn’t help but think that this process was way too involved. Here are the Application instructions from the Jamberry site:
Step 1: Clean nails with nail polish remover or alcohol. (Clean, oil free nails are one of the most important steps of the application)
Step 2: Cut and file nails to desired length and shape.
Step 3: Buff top of the nail and push back cuticle.
Step 4: Match nail (finger or toe) to the nail shield that best fits.
Step 5: Peel off nail shield and warm with a blow-dryer 10-15 seconds or until soft and flexible.
Step 6: When warm, press the shield onto the nail. Apply firm pressure around edges to adhere the shield to the nail. Use rubber cuticle pusher to seal the shield around the cuticle.
Step 7: Trim the top with scissors and file off remaining shield using a downward motion to remove excess.
Step 8: Apply heat and pressure to the shield again until it is sealed to the nail. (Repeating this step several times helps create a tight seal to the nail surface and increases wear time)
Optional Step 9: For active users you can add a small amount of nail glue to the free edge to better seal the nail shield.
Whew! That is a whole lotta lotta (as my mama would say). So off I went. My previously long nails had been reduced to nubs by the time I decided to apply my Jams so I was able to cut one in half to use on both accent nails. I usually like to make my ring fingers the accent but I did have an issue with the width of the shield not completely covering my nail and the material wasn’t pliable enough to stretch it any. I ended up using them on my index fingers and filled in the gaps with black polish which camouflaged well. Keep in mind that this was a sample and that the actual sheets come with 18 shields in different widths.
The instructions and video suggest using a blow dryer as your heat source but since I happened to be freezing at the time, I thought my space heater would work just as well and it did (without all the noise I might add). I was able to get the shields on my nails without any air bubbles or folds and it only took a few minutes to apply. I applied my Jams to two nails and the entire process took maybe 10 minutes from start to finish.
I did have some issues with lifting at the tips of my nails but they are so short that I couldn’t really get a good seal without using nail glue which I opted not to do.
The finished product. Not too bad for my first time.
I’ve had them on for about five days now and they’re not too shabby. I think I did okay for my first time and will definitely keep Jamberry in my nail art rotation from now on. At $15 a sheet they are definitely a Fab and Frugal way to fancify (yeah, I said it) your nails.
So what say you? Would you give Jamberry Nails a try? Well here’s your chance! Nikki and I are offering two lovely ladies the chance to win the Jamberry Nail shields of their choice. All you have to do is enter below for a chance to win!
Good Luck!
*The fine print: This giveaway is open to US residents only, 18 years or older. The winners will be selected at random by Rafflecopter. Each of the two (2) winners will receive one (1) sheet of Jamberry Nail Shields of their choice valued at $15. By entering your e-mail address, you agree to receive e-mails from Fab Impressions. I promise not to spam you (unless you spam me first then all bets are off) and I won’t share your email address with anyone. Entries will be accepted until 12:00 AM EST December 7th 2012 and the winners will be announced on Facebook and Twitter on December 8th (winner will also be notified via email). This is not a sponsored giveaway. While Nikki graciously provided a sample for me to review, the nail shields provided as prizes have been paid for by me.
Comments
T. Espinoza is CEO at The Style Medic. She's the Diva next door, the girlfriend who always looks Fab but doesn’t spend a bundle. She works with the active, focused Diva who wants to look fly, save time and most of all, save money. T. can help you streamline your wardrobe, maximize your budget and take your style from flat-lined to FABULOUS!
You may also like...
24 Comments
Leave a Reply
Cancel reply
This site uses Akismet to reduce spam. Learn how your comment data is processed.


Lakisha
at
I have been looking for one of your consultants for my Bling and Things Holiday Expose’ event on Dec. 8th in Alexandria, VA. One more day to finalize the list of vendors if you or another consultant is interested.
candicenm
at
Hi Lakisha . . I know a consultant in that area that can help you out for your Bling and Things Holiday Expose’ If you give me your email address I can give it to her so the two of you can connect
Lakisha
at
Wonderful, I did go on the website and shot an email at the local one’s listed but have not heard back yet. They can email me at loseiboutique@gmail.com and visit the event at http://blingandthingsholidayexpose.eventbrite.com. Come out and join us ladies!
Peace and Blessings!
melisasource
at
Oh wow–very nice! I had never heard of Jamberry before. The designs look awesome!
T. Espi
at
They’re a new Direct Sales company (like Mary Kay). I think it would be fun to have a Jamberry party. Hmmm…
candicenm
at
It would be fun to have a party 🙂 I also offer online parties for those that are not local 🙂
Saidah@AProverbsWife.com
at
So cute!! I have a silver set I may try to apply this Holiday season.
T. Espi
at
They just have so many! You could get one to match every mood LOL
P@mmy P@m (@Pamlovesbooks)
at
yay i’m a fan!
candicenm
at
Thank you to all of the ladies that are interested in Jamberry Nails and Thank you T. Espi for your review . . . For all interested please go to http://loveyourjams.jamberrynails.net/home/host.aspx and click host a party so that you can host your very own online party
Janeane M. Davis
at
This is such a cute product! I cannot wait to try it!!!
bstanchie
at
WOW! I love the outcome of your nails! They look really good – nice combo!
T. Espi
at
Thank you bstanchie. I initially wanted to do a much lighter color but the red worked out perfectly.
T. Espi
at
Thanks! Did you check out the site? There are so many patterns/designs to choose from.
Christine
at
I LOVE the design/color combo that you chose. Lord knows my nails need some serious help so I’m hoping I’ll win one of these lovely sets. But if not, I’ll def have to check out the site 🙂
DjRelAt7
at
Those look beautiful and I love that they are not bad for you!
DjRelAt7
at
http://loveyourjams.jamberrynails.net/home/ProductDetail.aspx?id=625#.ULjntjPO98E These are my favorite
T. Espi
at
I like those too! You can do the newsprint nails at home. All you need is newspaper and alcohol. Check out YouTube for tutorials 🙂
Uneeka Jay
at
hmmm! Very interesting and CUTE!!!
Chasing oy
at
They look really cute!
Meredith
at
I love the dark red flora design. It’s pretty & sophiticated.
Hanifah Munadi
at
My daughter is a Hairstylist and Iwill be sharing your site with her. First class site.
T. Espi
at
Thank you Hanifah. I appreciate that 🙂
Allison
at
Methinks I likey!