
DIY
The Look for Less: DIY Zara Inspired Pompom Sandal
Hey boo heeeey! I know I’ve been MIA for a minute and I could try to justify my absence by saying that life got busy (which it kinda always is) or some other such thing, but the truth is, I’m an emotional blogger. I write/create when my heart is in it or not at all. This is also why I’m not one of these magical unicorns who blog full time and make enough money to pay bills and travel and be great… But I digress.
On one of my recent trips down the Instagram rabbit hole, I got particularly caught up in the life and style of Miss Charmsie. Her fun, colorful aesthetic will get you hooked and have you daydreaming about beaches and sunshine. You should totally follow her.
Anywho, while I was scrolling, I kept noticing this super cute pair of sandals and I immediately became obsessed. Behold:
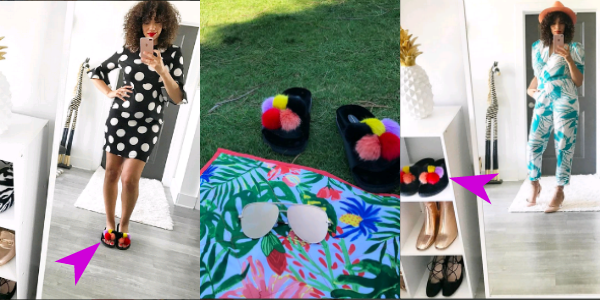
They even look good on the shelf! Find her on IG @Charmsie
Crazy cute right?! Pompoms are *still* having a moment and I’m loving the faux fur pom trend I’ve been seeing everywhere.
After cyber stalking her page for a while, I found that this pair was from Zara.

ZARA VELVET SANDALS WITH POMPOMS Details $49.90
I was all ready to hit ‘add to cart’ but 1) they weren’t available in my size and 2) they were $50 American dollars and I’m cheap frugal.
The solution? Zara Inspired DIY Pompom Sandal!
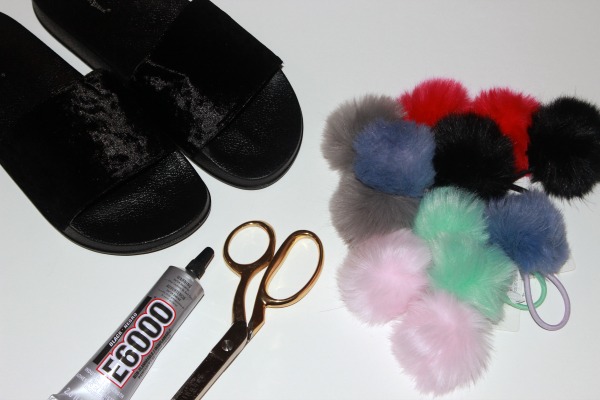
Materials needed:
- Slide sandals: $22 The inspiration pair are velvet both on the sole and the instep but the pair I got are only velvet on the instep
- 10 Assorted pompoms: Mine are hair ties from Michael’s but this 10 pack from Amazon is only $15.99
- Hot glue or E600
Make it:
- Step 1: I’m kind of a perfectionist when it comes to things like this so I used a ruler to find the exact center of the instep and marked where I’d put my first pom.
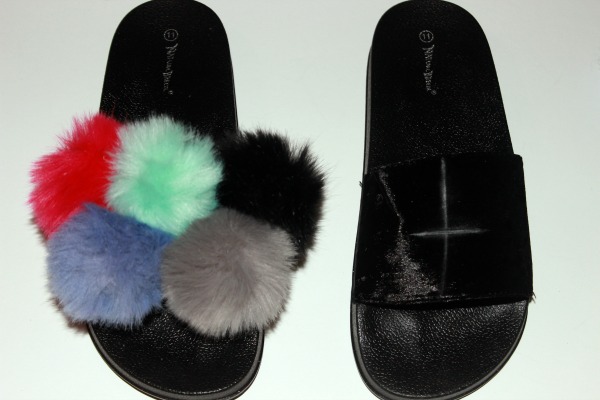
- Step 2: Using the inspo pair as a guide, I made two rows of poms with 3 on the top row and two on the bottom. I applied the E600 to the shoes and waited a little bit for it to get tacky before affixing the poms. Repeat this step until you’re done
- Wait about 24hrs for the glue to cure before wearing
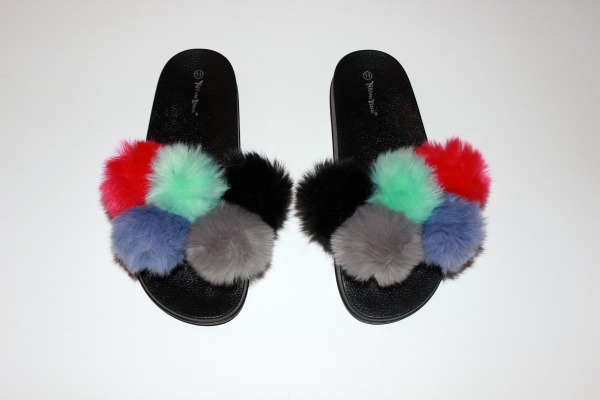
I love the fun, carnival vibes these are giving me.

What say you? Are you feeling the pompom trend? Are you team buy or DIY?


Stacie
at
Now that is clever. I use to be so creative and crafty but it seems I’ve lost my juice.
Mimi Green
at
I’m always team DIY. It is fun to see how the pom trend can go from winter to summer. The slide trend is heavy right now so this is right on time.
Welcome back, I missed ya!
LaShawn
at
These are so cute!! I wish I had even one crafty bone in my body, I could do so much!
Kita
at
These are so cute. I am lazy so I would probably buy the DIY is perfect.
Pingback: Do You Want Unique Embellished Slides? Do It Yourself! - MimiCuteLips
Kathleen Calado
at
Very creative!!! Cute as well. I’ll try them out as soon as I’m free. Thanks for sharing this! I wish the result of mine would look the same as yours. Keep sharing!
Diva Dealzz
at
This pompom sandal looks great something different.
Pingback: The Look for Less: DIY Splatter Paint Jeans | The Style Medic